
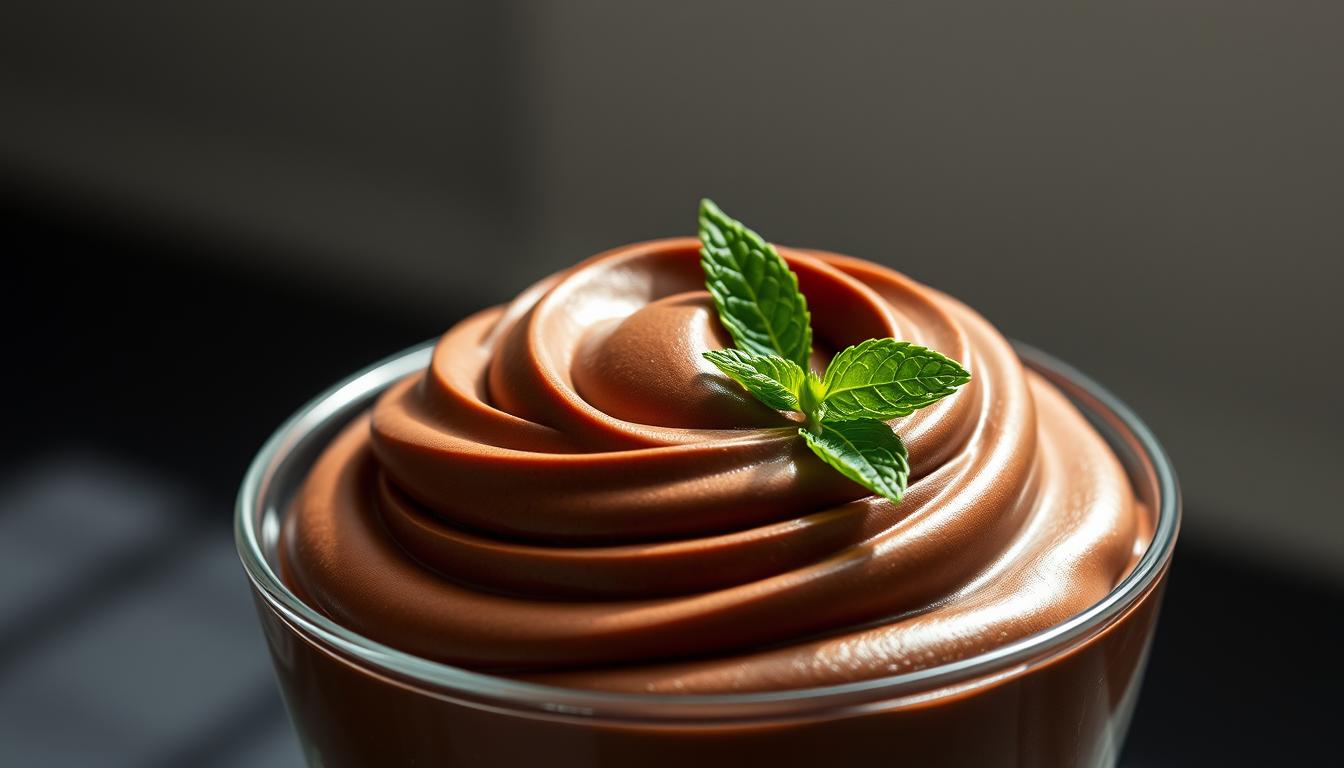
Do you ever crave something sweet but worry about the calories? Protein Mousse Imagine indulging in a creamy, rich dessert that not only satisfies your chocolate cravings but also fits into your healthy lifestyle. That’s exactly what this guilt-free chocolate mousse offers—a perfect blend of indulgence and nutrition.
This dessert is surprisingly simple to make, requiring just a few high-quality ingredients like Greek yogurt and cocoa powder. In under 10 minutes of preparation and about an hour of chilling, you’ll have a treat that’s as easy to make as it is delicious. The result is a velvety, smooth mousse that’s packed with flavor and nutrients1.
What makes this recipe stand out is its ability to balance taste and health. With no added sugars and a focus on wholesome ingredients, it’s a dessert you can enjoy without guilt. Whether you’re a health-conscious individual or just looking for a quick, satisfying treat, this chocolate mousse is sure to become a favorite.
Key Takeaways
- Learn how to make a guilt-free dessert that satisfies your chocolate cravings.
- Discover the simplicity of using high-quality ingredients like Greek yogurt and cocoa powder.
- Understand the nutritional benefits of this indulgent yet healthy treat.
- Find out why this recipe is perfect for health-conscious individuals.
- Enjoy a dessert that’s quick to prepare and easy to customize.
Introduction to Guilt-Free Protein Mousse
Craving a sweet treat without the guilt? This recipe has you covered. Imagine a dessert that’s creamy, rich, and packed with nutrients. It’s the perfect way to indulge while staying on track with your health goals.
Traditional desserts often come with a side of regret. But this version reimagines the classic mousse into a modern, health-conscious creation. By using high-quality ingredients like Greek yogurt and protein powder, you get a treat that’s both satisfying and nutritious2.
One of the standout features of this recipe is its simplicity. With just a few ingredients and less than 5 minutes of preparation, you can create a dessert that’s ready to chill and serve2. The result is a velvety smooth texture that’s hard to resist.
Here’s a quick breakdown of the key ingredients and their roles:
| Ingredient | Role |
|---|---|
| Greek Yogurt | Adds creaminess and protein |
| Protein Powder | Enhances texture and boosts protein content |
| Cocoa Powder | Provides rich chocolate flavor |
| Optional Cinnamon | Adds a hint of warmth and spice |
This dessert isn’t just about taste—it’s about balance. Each serving is designed to be indulgent yet nutritious, making it a great option for anyone looking to enjoy a treat without compromising their health3.
Whether you’re a fitness enthusiast or just someone who loves a good dessert, this recipe is a game-changer. It’s proof that you can have your cake and eat it too—guilt-free.
The Health Benefits Behind This Protein Mousse
Looking for a dessert that’s both indulgent and nutritious? This recipe combines rich flavors with health-boosting ingredients. It’s a treat that not only satisfies your sweet tooth but also supports your wellness goals.
Nutritional Advantages
This dessert is packed with benefits. It’s high in protein, providing 10-15 grams per serving, which is ideal for muscle recovery and satiety4. The low sugar content—less than 5 grams per serving—makes it a guilt-free option4.
Each serving contains around 150-200 calories, making it a perfect post-workout snack or a light dessert4. The use of cocoa powder adds a rich chocolate flavor while contributing antioxidants4.
High Protein & Low Sugar Yet Indulgent
What makes this dessert stand out is its balance. It’s indulgent yet nutritious. The cocoa powder and cocoa not only enhance the flavor but also provide health benefits like improved heart health and reduced inflammation4.
Vanilla extract adds a subtle sweetness without extra sugar. It also brings its own set of benefits, including antioxidants and anti-inflammatory properties4.
| Ingredient | Benefit |
|---|---|
| Cocoa Powder | Rich in antioxidants, improves heart health |
| Vanilla Extract | Adds flavor, contains antioxidants |
| Greek Yogurt | High in protein, supports gut health |
| Protein Powder | Boosts protein content, aids muscle recovery |
This dessert is proof that you don’t have to sacrifice taste for health. It’s a perfect blend of indulgence and nutrition, ready in just a few minutes4.
Key Ingredients for a Delicious Protein Mousse
Want a dessert that’s both creamy and healthy? The secret lies in selecting the right ingredients. Each component plays a crucial role in achieving the perfect texture and flavor while keeping it guilt-free.
Choosing the Right Protein Powder
Protein powder is the backbone of this dessert. Opt for a flavor that complements your recipe, like chocolate or vanilla. A single scoop (30 grams) is enough to provide 9g of protein per serving5. This ensures your treat is both satisfying and nutritious.
When selecting protein powder, consider its texture. Whey protein works well, but it may alter the consistency slightly6. Always measure it using a cup or bowl for accuracy.
Selecting Fresh Dairy and Flavor Enhancers
Greek yogurt is a star ingredient. It adds creaminess and boosts protein content. Use 1 cup of yogurt for the perfect balance6. If you’re avoiding dairy, coconut yogurt is a great alternative.
Fresh dairy like low-fat cottage cheese can also enhance the texture. It keeps the dessert light while controlling fat levels5. Combine it with cocoa powder for a rich chocolate flavor.
Flavor enhancers like vanilla extract add depth without extra sugar. Just 2 tablespoons of maple syrup or a sugar-free substitute can sweeten the mix6. Always chill the dessert in the fridge for at least 3 hours to achieve the perfect consistency.
Step-by-Step Recipe Instructions
Ready to whip up a dessert that’s both easy and healthy? Follow these simple steps to create a creamy, indulgent treat that’s perfect for any time of day. With just a few ingredients and minimal prep time, you’ll have a dessert that’s ready to chill and serve.
Mixing and Blending Techniques
Start by combining 1 cup of Greek yogurt, 2 tbsp of cocoa powder, and 1 tbsp of vanilla extract in a mixing bowl. Use an electric hand mixer or blender to blend the ingredients until smooth. This step takes about 3 minutes and ensures a velvety texture7.
For added sweetness, mix in 2 tbsp of maple syrup or a sugar-free substitute. Blend again for 1-2 minutes to fully incorporate the flavors. Note: Overmixing can affect the consistency, so stop once the mixture is smooth8.
Chilling and Serving Process
Transfer the mixture into individual serving cups or jars. Cover them with plastic wrap or lids and place them in the fridge. The dessert needs at least 3 hours to set, but overnight chilling yields the best results7.
Once chilled, your treat is ready to serve. For added flair, top with fresh berries or a sprinkle of cocoa powder. Note: This dessert can be stored in the fridge for up to 5 days, making it a great make-ahead option8.
Tips & Tricks for the Perfect Mousse Texture
Achieving the perfect texture for your dessert doesn’t have to be complicated. With the right prep and techniques, you can create a silky, lump-free treat every time. Here’s how to master the art of smooth mousse.
How to Avoid Lumpy Mixtures
Lumps can ruin the texture of your dessert. Start by ensuring all ingredients are at room temperature. This helps them blend seamlessly. Use a blender or food processor for a smoother mix9.
When working with chocolate protein powder, sift it before adding. This prevents clumps and ensures even distribution. Mixing in small batches also helps maintain consistency10.
- Combine ingredients gradually, blending after each addition.
- Use a spatula to scrape the sides of the bowl to incorporate all elements.
- Chill the mixture for at least 3 hours to set properly9.
Here’s a quick guide to troubleshoot common issues:
| Issue | Solution |
|---|---|
| Lumpy Texture | Sift dry ingredients, blend thoroughly |
| Grainy Consistency | Ensure chocolate is fully melted, mix at the right temperature |
| Overly Dense | Avoid over-whipping, use medium peaks |
By following these instructions, you’ll achieve a smooth, indulgent dessert every time. Whether you’re a beginner or a pro, these tips will elevate your mousse game.
Customizing Your Protein Mousse Experience
<p>Ever thought about making a dessert that’s both delicious and healthy? The beauty of this mousse recipe lies in its versatility. You can easily tweak it to suit your taste buds and dietary preferences. Whether you’re a fan of classic flavors or want to experiment with something new, the options are endless.

Flavor Variations: Chocolate, Vanilla, and More
Start by playing with flavors. If you love chocolate protein, stick with cocoa powder for a rich, indulgent taste. For a lighter option, try vanilla extract or even a hint of cinnamon. You can also mix in a scoop of protein chocolate powder to boost the flavor and nutritional value11.
Feeling adventurous? Add a tablespoon of peanut butter or almond butter for a nutty twist. These ingredients not only enhance the taste but also provide healthy fats12. The key is to experiment and find what works best for you.
Topping Options for an Extra Indulgence
Toppings can take your dessert to the next level. Sprinkle some chocolate chips for a satisfying crunch. Fresh berries like strawberries or raspberries add a burst of freshness and color. For a creamy finish, drizzle a bit of yogurt on top13.
Here’s a quick guide to popular topping combinations:
- Chocolate chips + shredded coconut
- Fresh berries + a dollop of yogurt
- Crushed nuts + a drizzle of honey
By customizing your dessert, you can create a unique treat every time. It’s all about making it your own.
Essential Equipment and Kitchen Hacks
Creating a smooth, creamy dessert starts with the right tools. The equipment you use can significantly impact the texture and flavor of your treat. Whether you’re a beginner or a seasoned cook, having the right gadgets ensures your dessert turns out perfect every time.
Must-Have Tools for a Smooth Process
To achieve the perfect consistency, you’ll need a few key tools. A blender or food processor is essential for creating a lump-free mixture. These gadgets ensure all ingredients blend seamlessly, giving your dessert a velvety finish14.
If you prefer a more hands-on approach, a hand mixer can also do the job. It’s perfect for smaller batches and allows you to control the mixing process. Whichever tool you choose, make sure it’s clean and in good condition for the best results15.
Using a Blender vs. Hand Mixer
Both tools have their strengths. A blender is ideal for larger quantities and ensures a smooth, even texture. It’s also great for incorporating ingredients like cocoa powder or protein powder without clumps14.
On the other hand, a hand mixer offers more control. It’s perfect for smaller batches and allows you to adjust the speed as needed. However, it may require more effort to achieve the same smoothness as a blender15.
| Tool | Best For | Tips |
|---|---|---|
| Blender | Large batches, smooth texture | Blend in short bursts to avoid overheating |
| Hand Mixer | Small batches, controlled mixing | Use medium speed for best results |
Feel free to experiment with both tools to find what works best for you. Each has its unique advantages, and the choice depends on your preferences and the recipe you’re following14.
Maintaining your equipment is also crucial. Clean your tools thoroughly after each use to ensure they last longer and perform well. With the right tools and a little practice, you’ll master the art of creating smooth, delicious desserts every time.
Other High Protein Dessert Inspirations
Ready to discover desserts that are both delicious and good for you? Beyond the classic recipe, there’s a world of high-protein treats waiting to be explored. These desserts not only satisfy your cravings but also align with your health goals.

Exploring Chocolate Flavor Variations
If you love the rich taste of chocolate, there are plenty of ways to intensify it while keeping sugar low. Try adding cocoa powder or dark chocolate chips for a deeper flavor. For a creamy twist, mix in a tablespoon of peanut butter. This adds richness and healthy fats to your dessert16.
Another option is to use sugar-free chocolate syrup or powder. These alternatives enhance the chocolate flavor without adding extra sugar. You can also experiment with different types of chocolate, like white or milk, to find your favorite combination17.
Related Recipes to Try at Home
Looking for more ideas? Here are a few recipes that build on the high-protein concept:
- Single-Serving Mug Cakes: Quick and easy, these cakes are perfect for a late-night treat. Use Greek yogurt and protein powder for a protein boost16.
- Banana Protein Muffins: These muffins are moist and flavorful, thanks to ripe bananas and a hint of vanilla. They’re great for breakfast or a snack17.
- Chia Seed Pudding: Packed with fiber and protein, this pudding is a healthy alternative. Top it with fresh berries or a sprinkle of cocoa powder for extra flavor18.
Here’s a quick comparison of these recipes:
| Recipe | Key Ingredient | Preparation Time |
|---|---|---|
| Mug Cakes | Greek Yogurt | 5 minutes |
| Banana Muffins | Ripe Bananas | 20 minutes |
| Chia Pudding | Chia Seeds | Overnight |
These recipes are simple to make and can be customized to suit your taste. Whether you’re a fan of chocolate or prefer something fruity, there’s a high-protein dessert for everyone.
Conclusion
Indulging in a healthy dessert doesn’t have to be complicated or time-consuming. This recipe combines simplicity with nutrition, offering a creamy treat that’s both delicious and guilt-free. With just a few ingredients and minimal prep, you can create a dessert that fits seamlessly into your lifestyle.
The key lies in the carefully chosen ingredients and precise techniques. The mixture of Greek yogurt, cocoa powder, and natural sweeteners ensures a smooth, velvety texture. Once prepared, store your dessert in an airtight container to maintain its freshness and flavor19.
This recipe’s versatility allows for endless creativity. You can transform the base mixture into variations like a no-bake cheesecake or a layered parfait. Experiment with toppings like fresh berries or chopped nuts to add extra crunch and flavor20.
By balancing taste and nutrition, this dessert proves that you don’t have to sacrifice indulgence for health. Whether you’re a beginner or a seasoned cook, this treat is a perfect addition to your recipe collection. Enjoy the process and savor every bite!